> ## Documentation Index
> Fetch the complete documentation index at: https://domoinc-bradley-turek-pfilter-operators-reference.mintlify.site/llms.txt
> Use this file to discover all available pages before exploring further.
# First 5 Things to Do in Domo
## Intro
As you begin your journey with Domo, there are a few key steps to ensure a smooth start. This guide will walk you through these initial actions, which include uploading your logo, setting your time zone, inviting users, and more. Let's dive in!
***
## Access Company Settings
Most of these tasks can be completed in the company settings. Follow these steps to access them:
1. Open the **Features** menu in the left navigation and go to the **Admin** tab.
 2. Under **Company settings**, select **Company** **overview**.
## Upload Your Company Logo
Your company logo is a critical part of your Domo instance. It not only personalizes your experience but also assures users they are in the right place.
Follow these steps:
1. [Access](#access-company-settings) the company settings, described above.
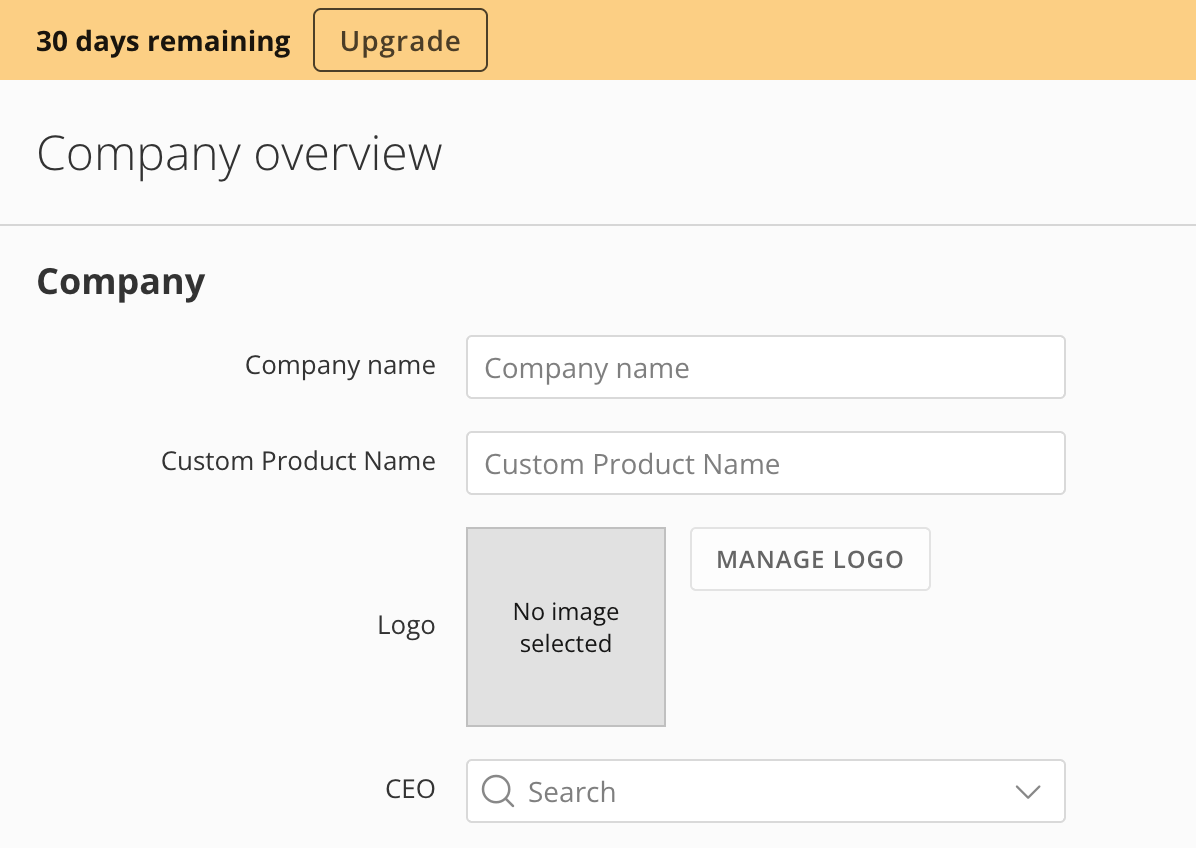
2. Select **Manage Logo** to choose a company logo.
2. Under **Company settings**, select **Company** **overview**.
## Upload Your Company Logo
Your company logo is a critical part of your Domo instance. It not only personalizes your experience but also assures users they are in the right place.
Follow these steps:
1. [Access](#access-company-settings) the company settings, described above.
2. Select **Manage Logo** to choose a company logo.
 3. Save your changes using the **Save** option on the **Company overview** page.
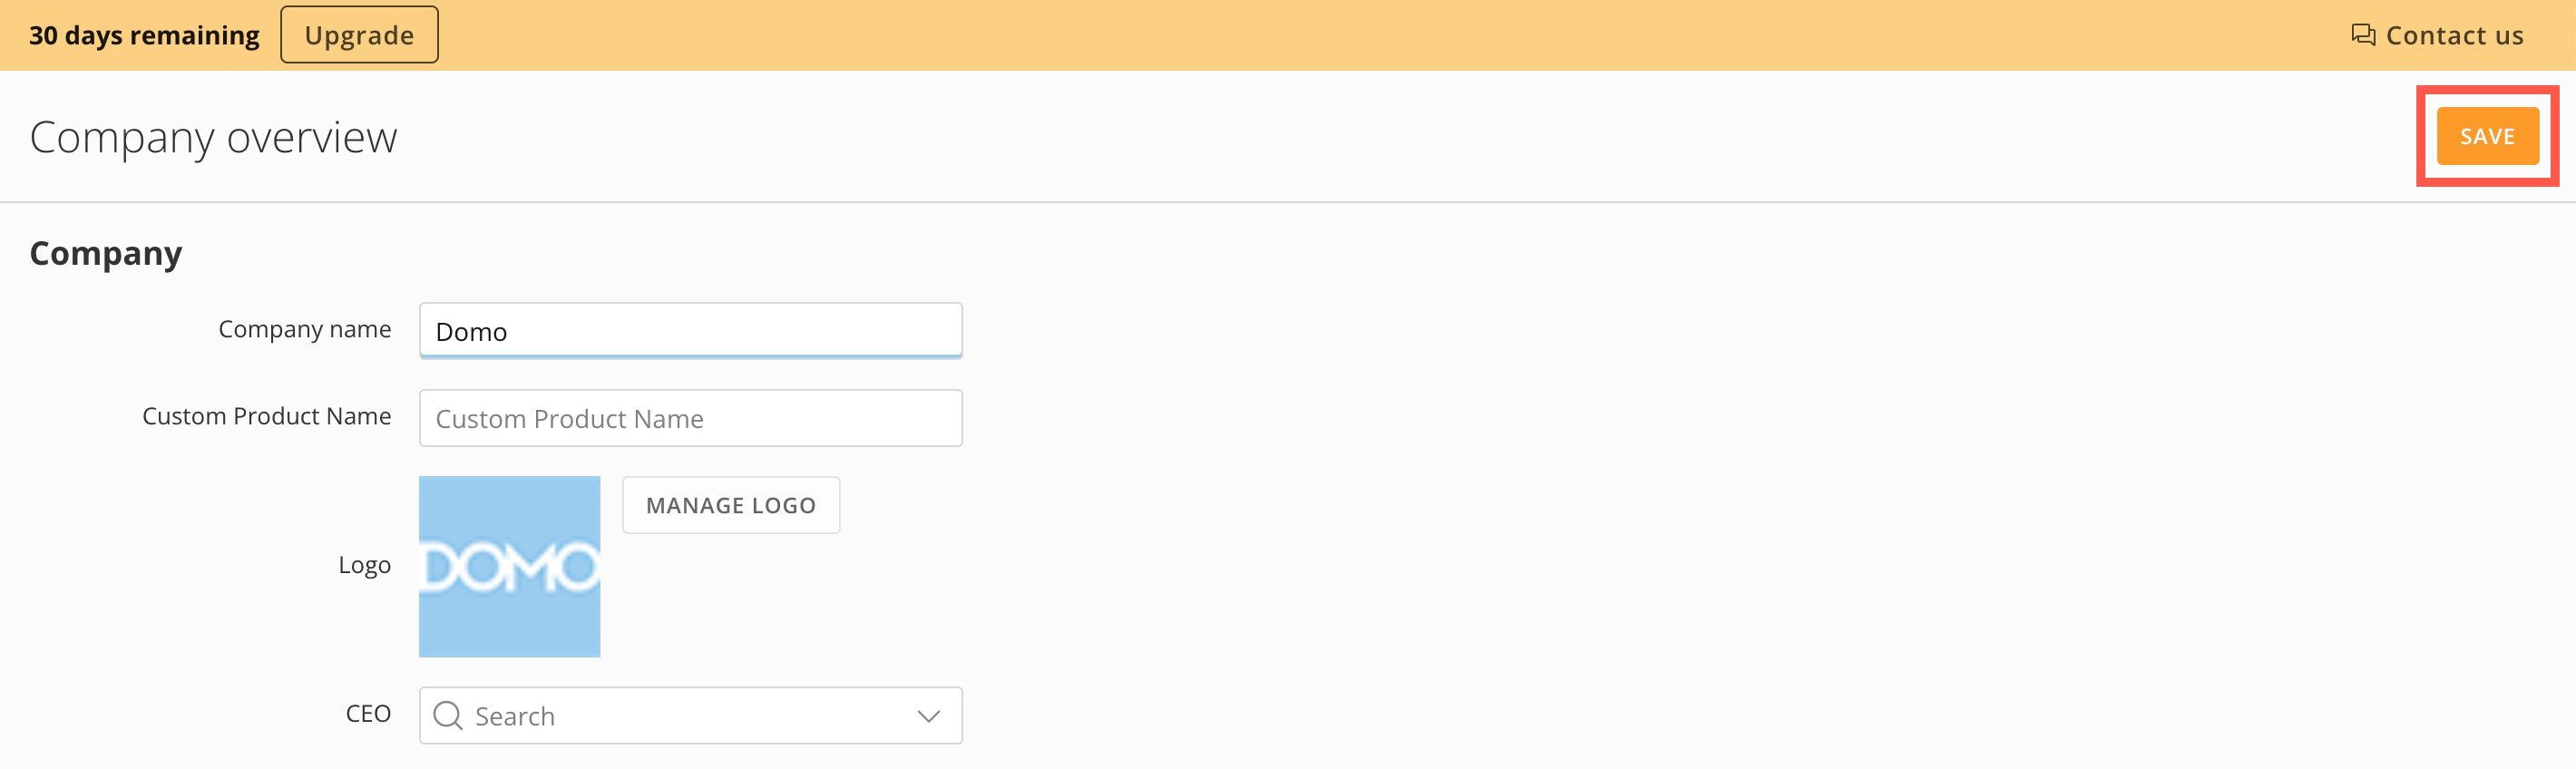 You can also enter your company's name and choose a default language on this screen.
## Set Your Time Zone
Correctly setting your time zone is crucial for scheduling and data triggers.
**Note:** Setting your timezone only changes items in the Domo platform. It does not change any raw data coming into Domo.
Follow these steps:
1. [Access](#access-company-settings) the company settings, described above.
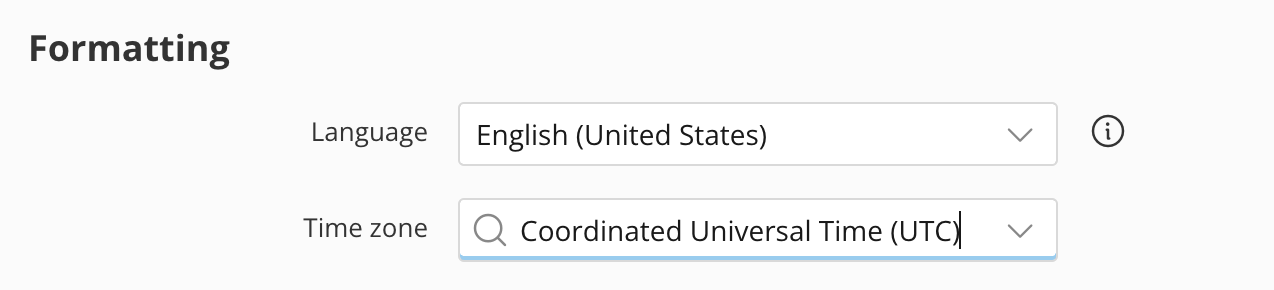
2. Under **Formatting**, choose your time zone.
You can also enter your company's name and choose a default language on this screen.
## Set Your Time Zone
Correctly setting your time zone is crucial for scheduling and data triggers.
**Note:** Setting your timezone only changes items in the Domo platform. It does not change any raw data coming into Domo.
Follow these steps:
1. [Access](#access-company-settings) the company settings, described above.
2. Under **Formatting**, choose your time zone.
 ## Configure Week Dates
Week dates influence how your charts and analyses display data by week.
Follow these steps:
1. [Access](#access-company-settings) the company settings, described above.
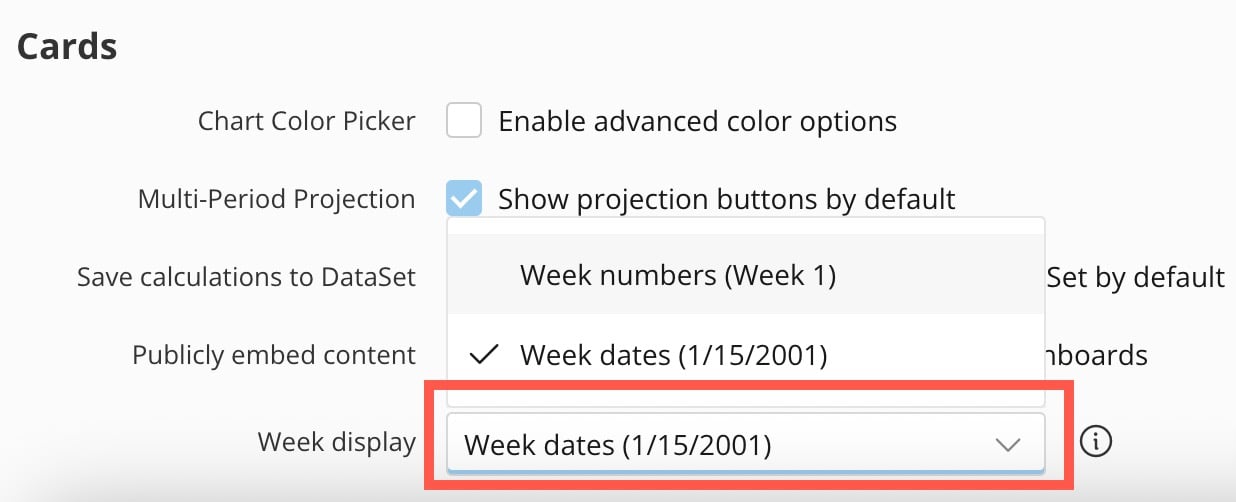
2. Scroll to the bottom of the page and use the **Week display** dropdown to choose your preference.
1. **Week dates —** 1/15/2001
2. **Week numbers —** (Week 1, Week 2, and so on)
## Configure Week Dates
Week dates influence how your charts and analyses display data by week.
Follow these steps:
1. [Access](#access-company-settings) the company settings, described above.
2. Scroll to the bottom of the page and use the **Week display** dropdown to choose your preference.
1. **Week dates —** 1/15/2001
2. **Week numbers —** (Week 1, Week 2, and so on)
 ## Add Security with Domain Restrictions
**Optional Domain Security:**
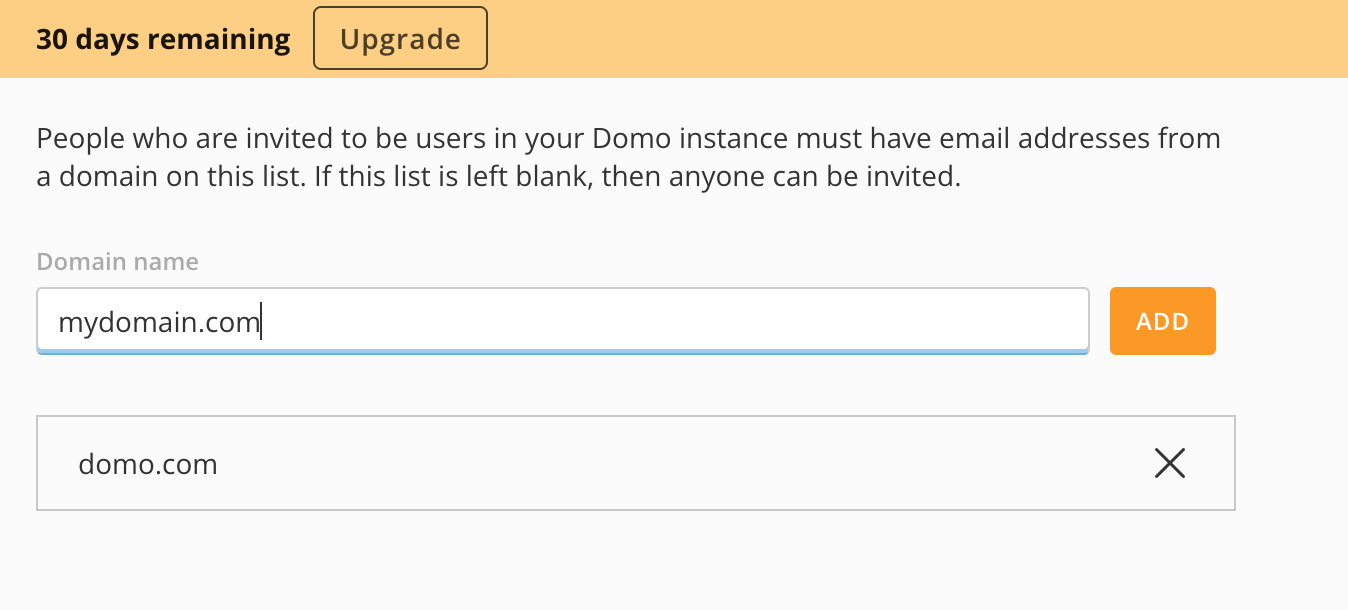
For added security, you can restrict user access to your Domo instance based on email domains. That way, only users who have a verified email address from a specific domain can be added to your Domo instance.
Follow these steps to configure domain restrictions:
1. Open the **Features** menu in the left navigation and go to the **Admin** tab.
2. Under **Network security**, select **Invite authorized domains**.
3. Enter the approved domains. Only email addresses from these domains can join your Domo instance.
## Add Security with Domain Restrictions
**Optional Domain Security:**
For added security, you can restrict user access to your Domo instance based on email domains. That way, only users who have a verified email address from a specific domain can be added to your Domo instance.
Follow these steps to configure domain restrictions:
1. Open the **Features** menu in the left navigation and go to the **Admin** tab.
2. Under **Network security**, select **Invite authorized domains**.
3. Enter the approved domains. Only email addresses from these domains can join your Domo instance.
 ## Invite Users and Assign Roles
Inviting colleagues to your Domo instance and assigning appropriate roles is a fundamental step for success.
Follow these steps:
1. Open the **Features** menu in the left navigation and go to the **Admin** tab.
2. Under **Governance**, select **People**.
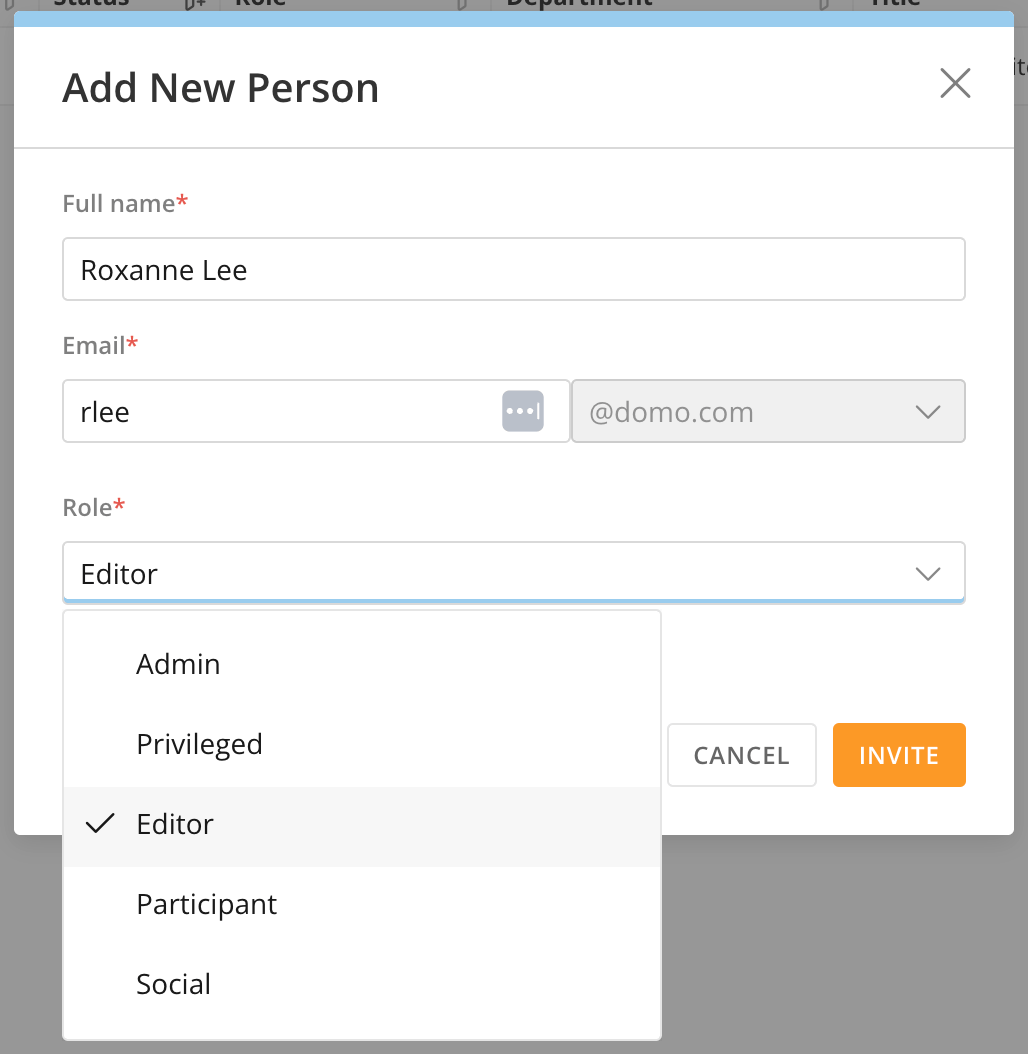
3. Select **Add New Person** and add their name and email address.
4. Choose an appropriate role for them. Editor is generally a good starting point for new users. To learn more about the available roles, see the [System Roles | Reference](/s/article/360043438953).
*
## Invite Users and Assign Roles
Inviting colleagues to your Domo instance and assigning appropriate roles is a fundamental step for success.
Follow these steps:
1. Open the **Features** menu in the left navigation and go to the **Admin** tab.
2. Under **Governance**, select **People**.
3. Select **Add New Person** and add their name and email address.
4. Choose an appropriate role for them. Editor is generally a good starting point for new users. To learn more about the available roles, see the [System Roles | Reference](/s/article/360043438953).
*
 The person you added now displays in the list.
