

Intro
This article explains how to create a Microsoft Azure app, configure the Microsoft SharePoint Online Single Tenant Writeback connector, and push data from a Domo DataSet to SharePoint. Microsoft SharePoint Online enables organizations to create and manage custom team-focused and project-focused sites for collaboration. To learn more about the SharePoint API, see the Microsoft SharePoint API documentation. You configure your Domo-SharePoint connection in the Data Center. This article discusses the fields and menus that are specific to the SharePoint Online Single Tenant Writeback connector. General information for adding DataSets, setting update schedules, and editing DataSet information is discussed in Adding a DataSet Using a Data Connector.Required Grants
The grants required to use this connector depend on your role configuration. Contact your Domo account team for guidance.Prerequisites
To configure this connector, you must have the following:- An installed Microsoft Azure app. See Create an Azure App below.
- Your Domo Client ID and Client Secret. Learn how to get your Domo Client ID and Secret.
- Your tenant domain name.
- The SharePoint Client ID and Client Secret associated with your Microsoft Azure app.
- SharePoint Client ID — in the Azure portal, go to Azure Active Directory > App registrations, select your web app, and copy the Application ID.
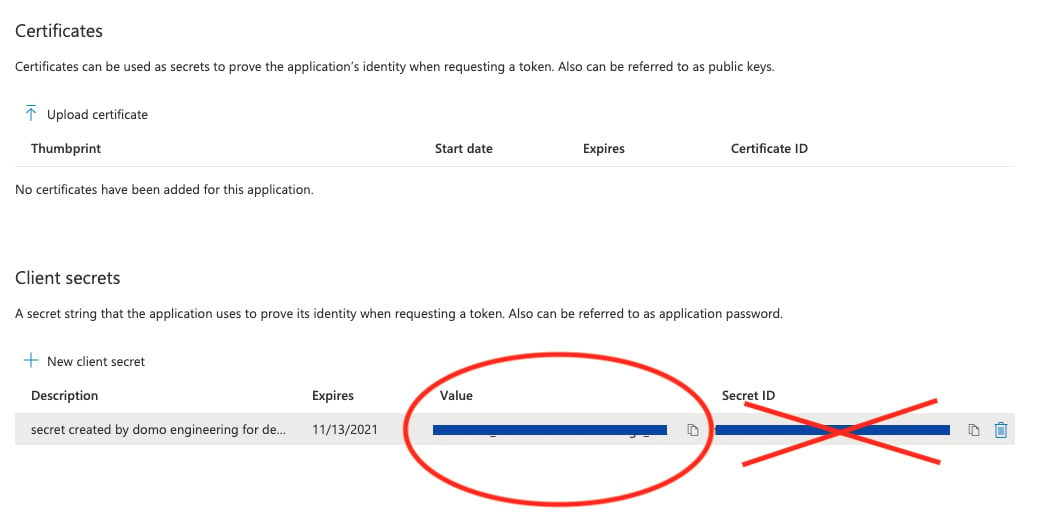
- SharePoint Client Secret — in the Azure portal, go to Azure Active Directory > App registrations, select your web app, open Certificates and secrets, select + New client secret, enter a description and expiry period, and select Add. Copy the resulting Value before leaving the page.
Create an Azure App
Before you can configure the connector in Domo, you must register an Azure app to obtain the credentials the connector uses to authenticate.- Log in to the Azure portal.
-
Select App registrations.
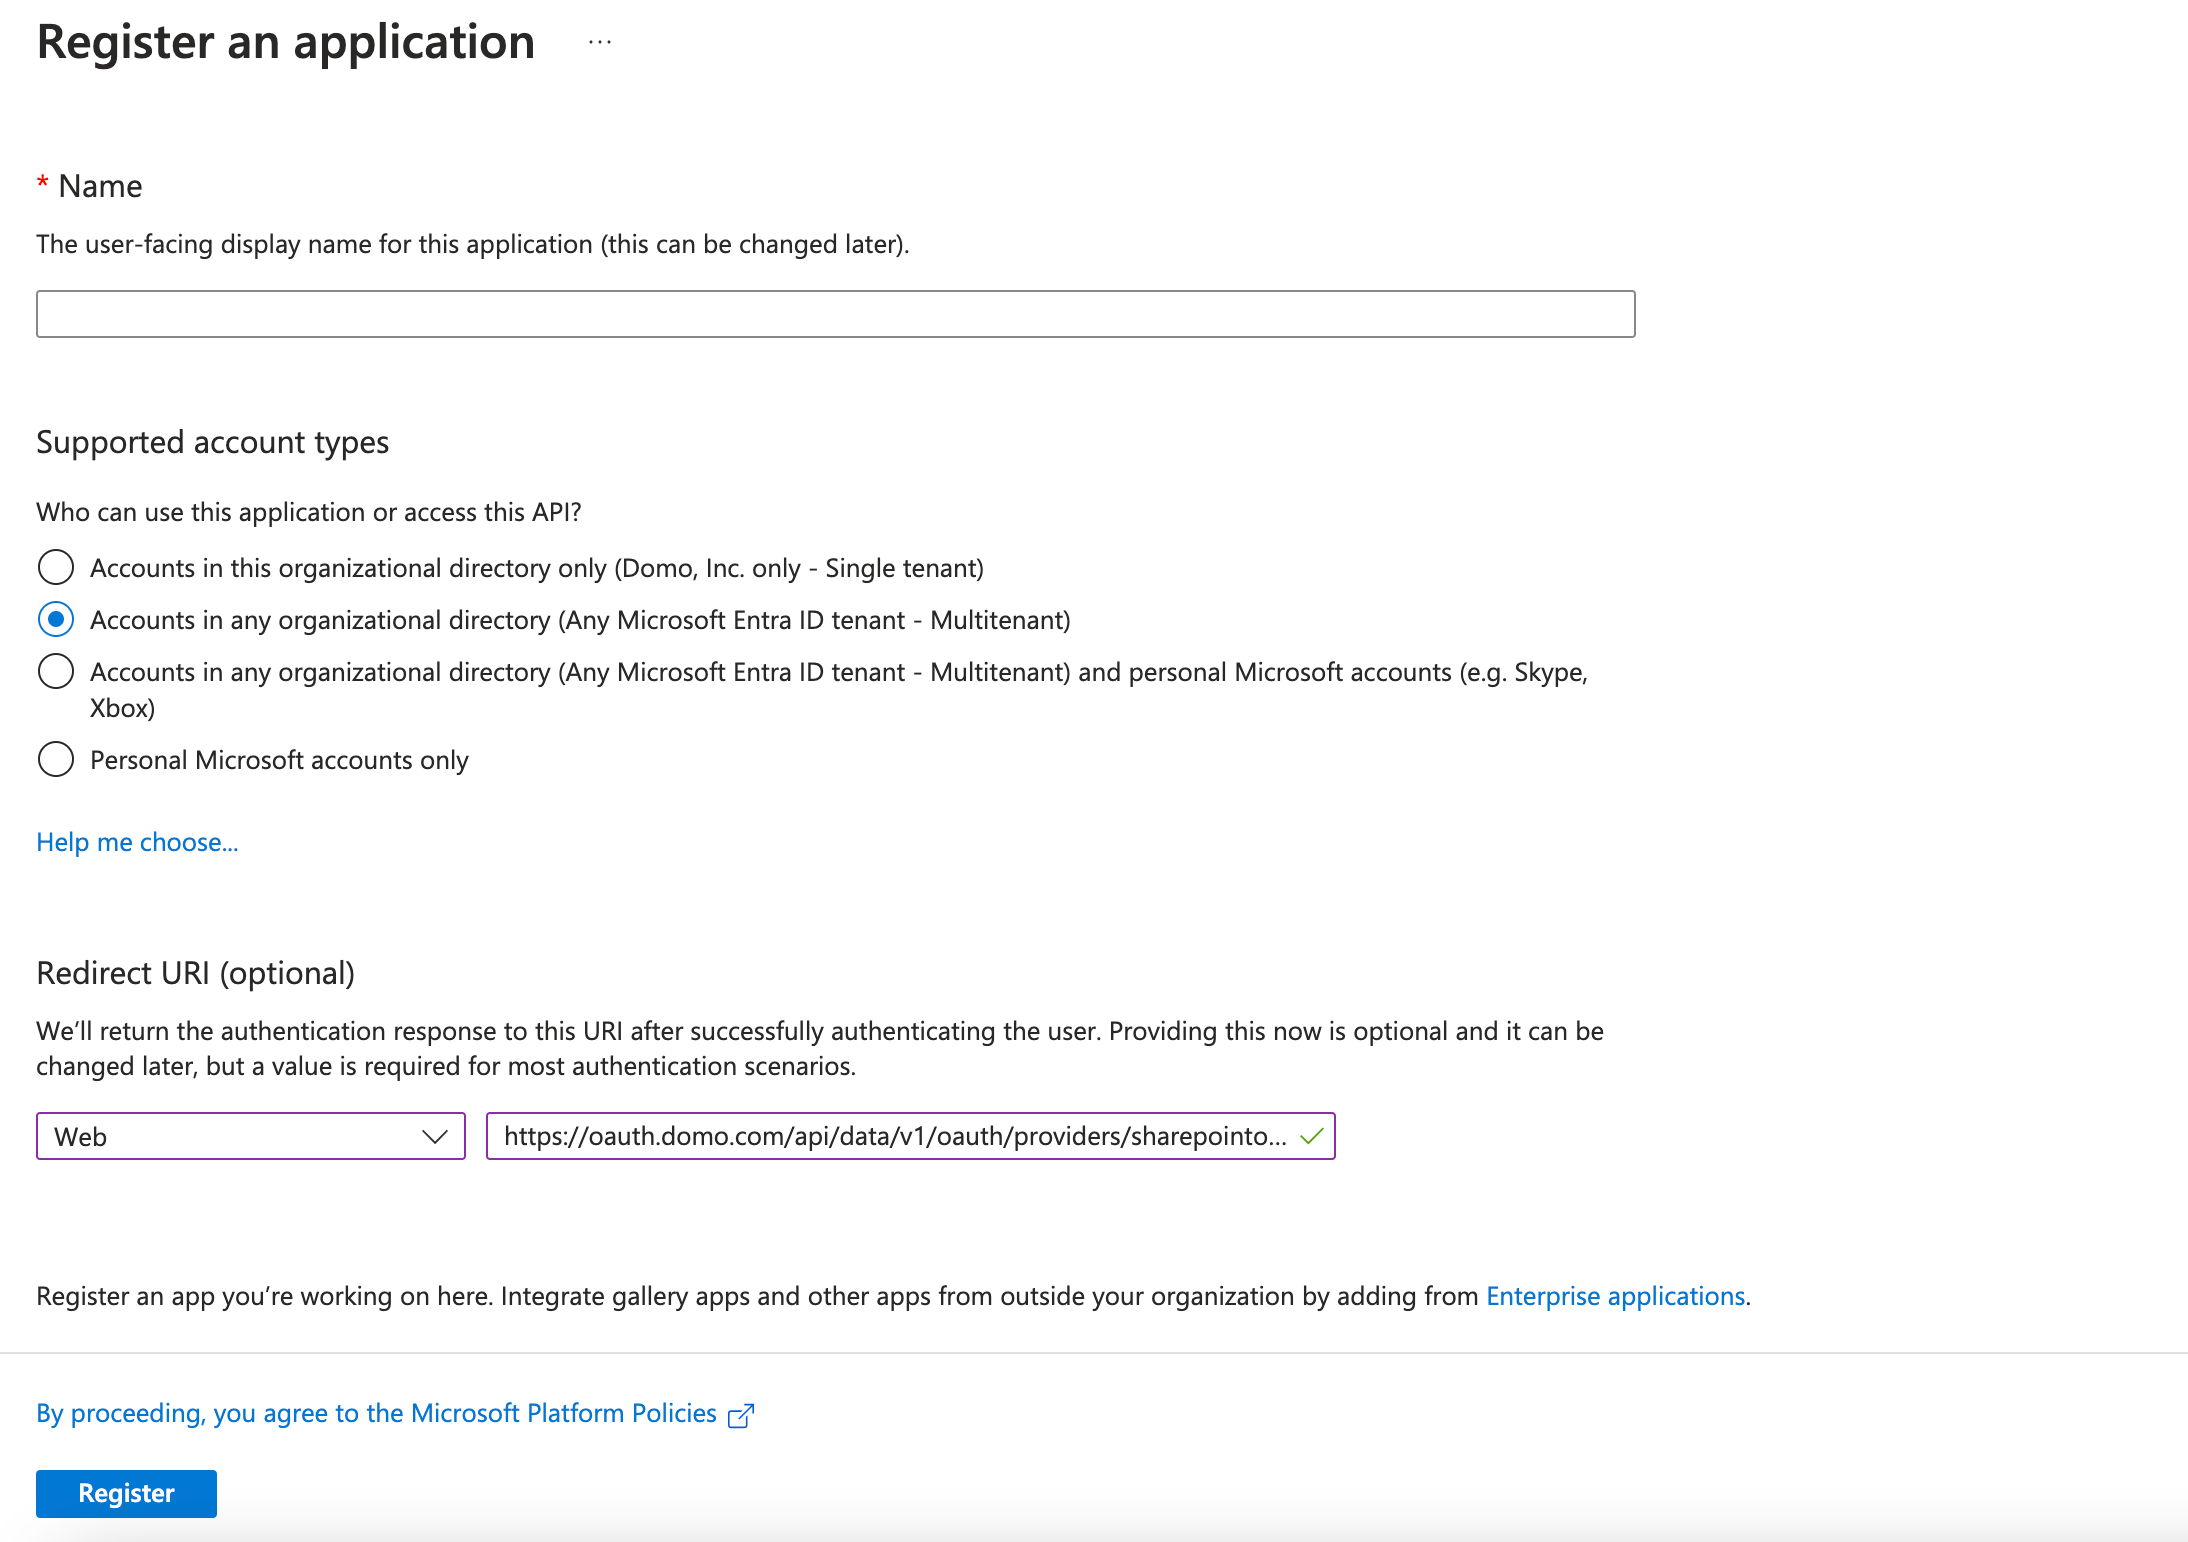
- Select New registration.
-
Enter the application name and select the supported account type. For Redirect URI, select Web and enter
https://oauth.domo.com/api/data/v1/oauth/providers/sharepointonlinewriteback-singletenant/exchange. - Select Register. The Application ID that appears is the SharePoint Client ID you enter in the Credentials pane in Domo.
- After the application is registered, assign the required API permissions. Select API Permissions.
-
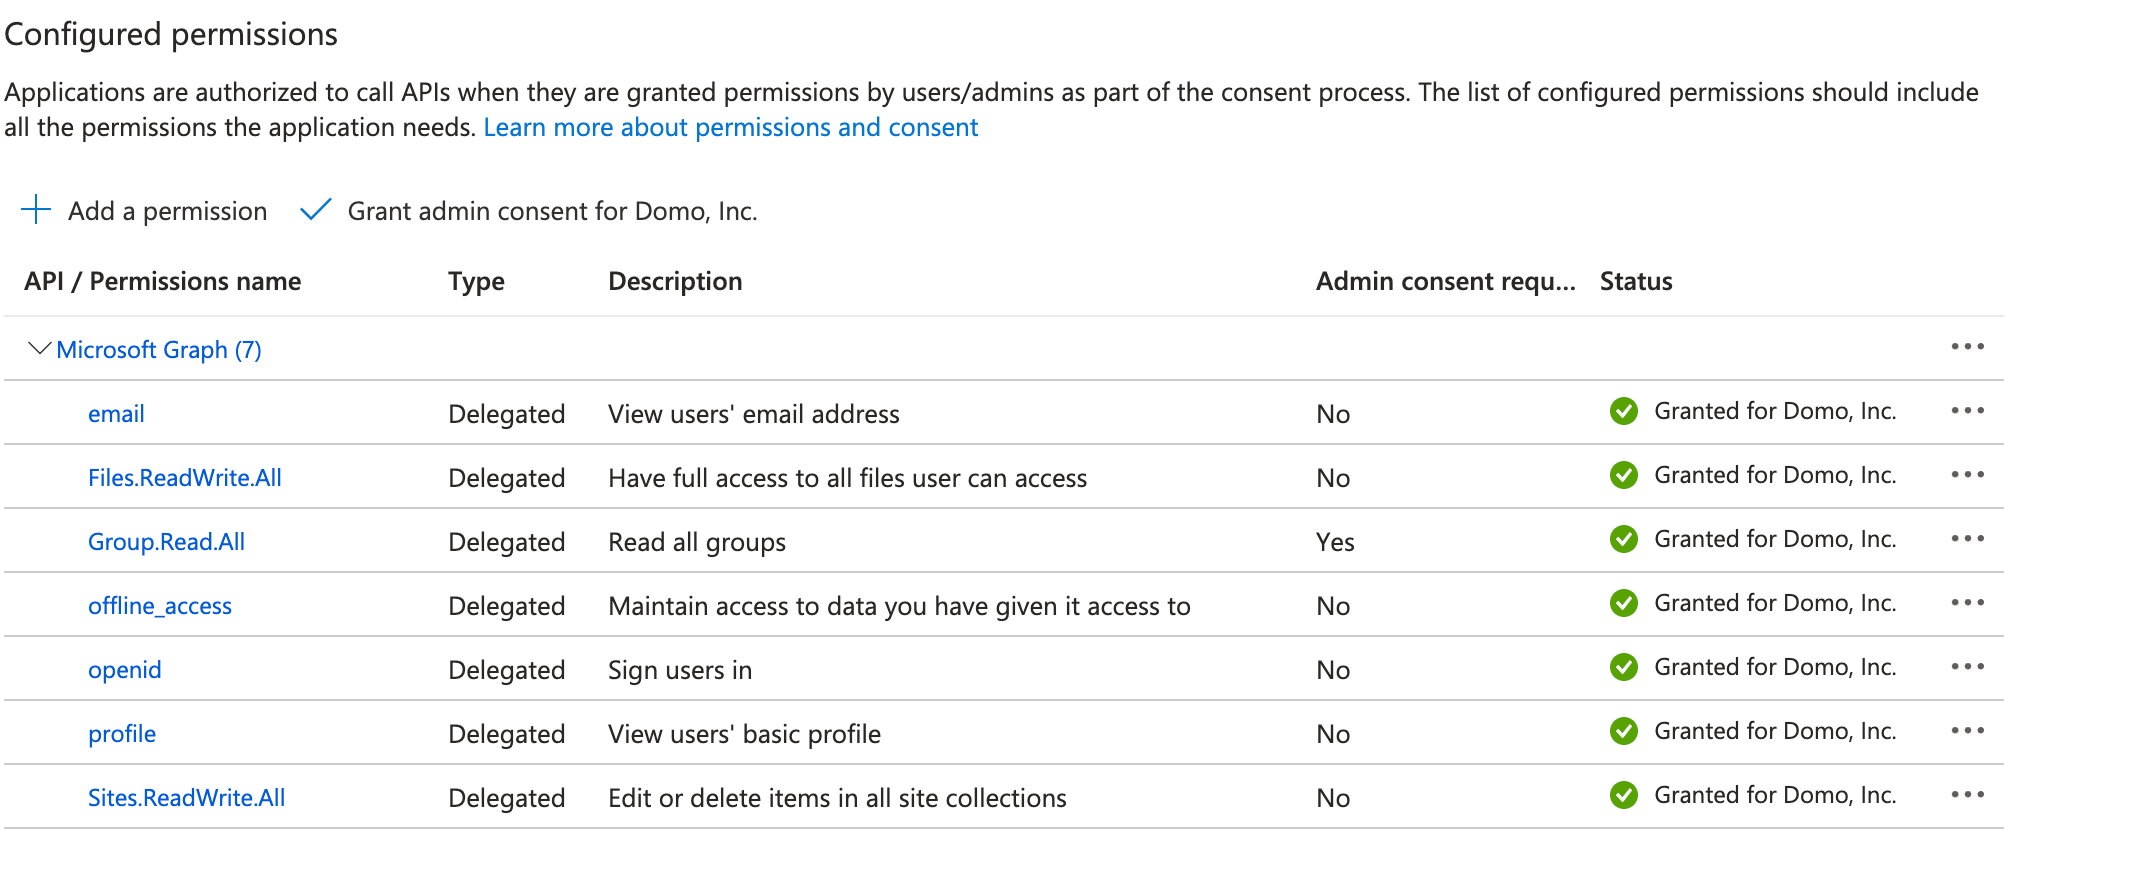
Select + Add permissions and select the permissions as required.
After you add the permissions, the configured permissions display.
- Under Manage, select Certificates & Secrets. Certificates can be used as secrets to prove the application’s identity when requesting a token, and may also be referred to as public keys.
- Select + New client secret.
-
Enter a value in Description, select a suitable option for Expires, and select Add.
Configure the Connection
This section describes the options in the Credentials and Details panes on the Microsoft SharePoint Online Single Tenant Writeback page. The components of the other panes on this page — Scheduling and Name & Describe Your DataSet — are universal across most connector types and are discussed in Adding a DataSet Using a Data Connector.Credentials Pane
This pane contains fields for entering credentials to connect to your SharePoint Online account. The following table describes what is needed for each field:
After you have entered valid credentials, you can use the same account any time you create a new SharePoint Online Single Tenant Writeback DataSet. You can manage connector accounts in the Accounts tab in the Data Center. For more information about this tab, see Managing User Accounts for Connectors.